
This is a remix my BRB BRB project using cheaper components, namely a Digispark knockoff instead of a Teensy…
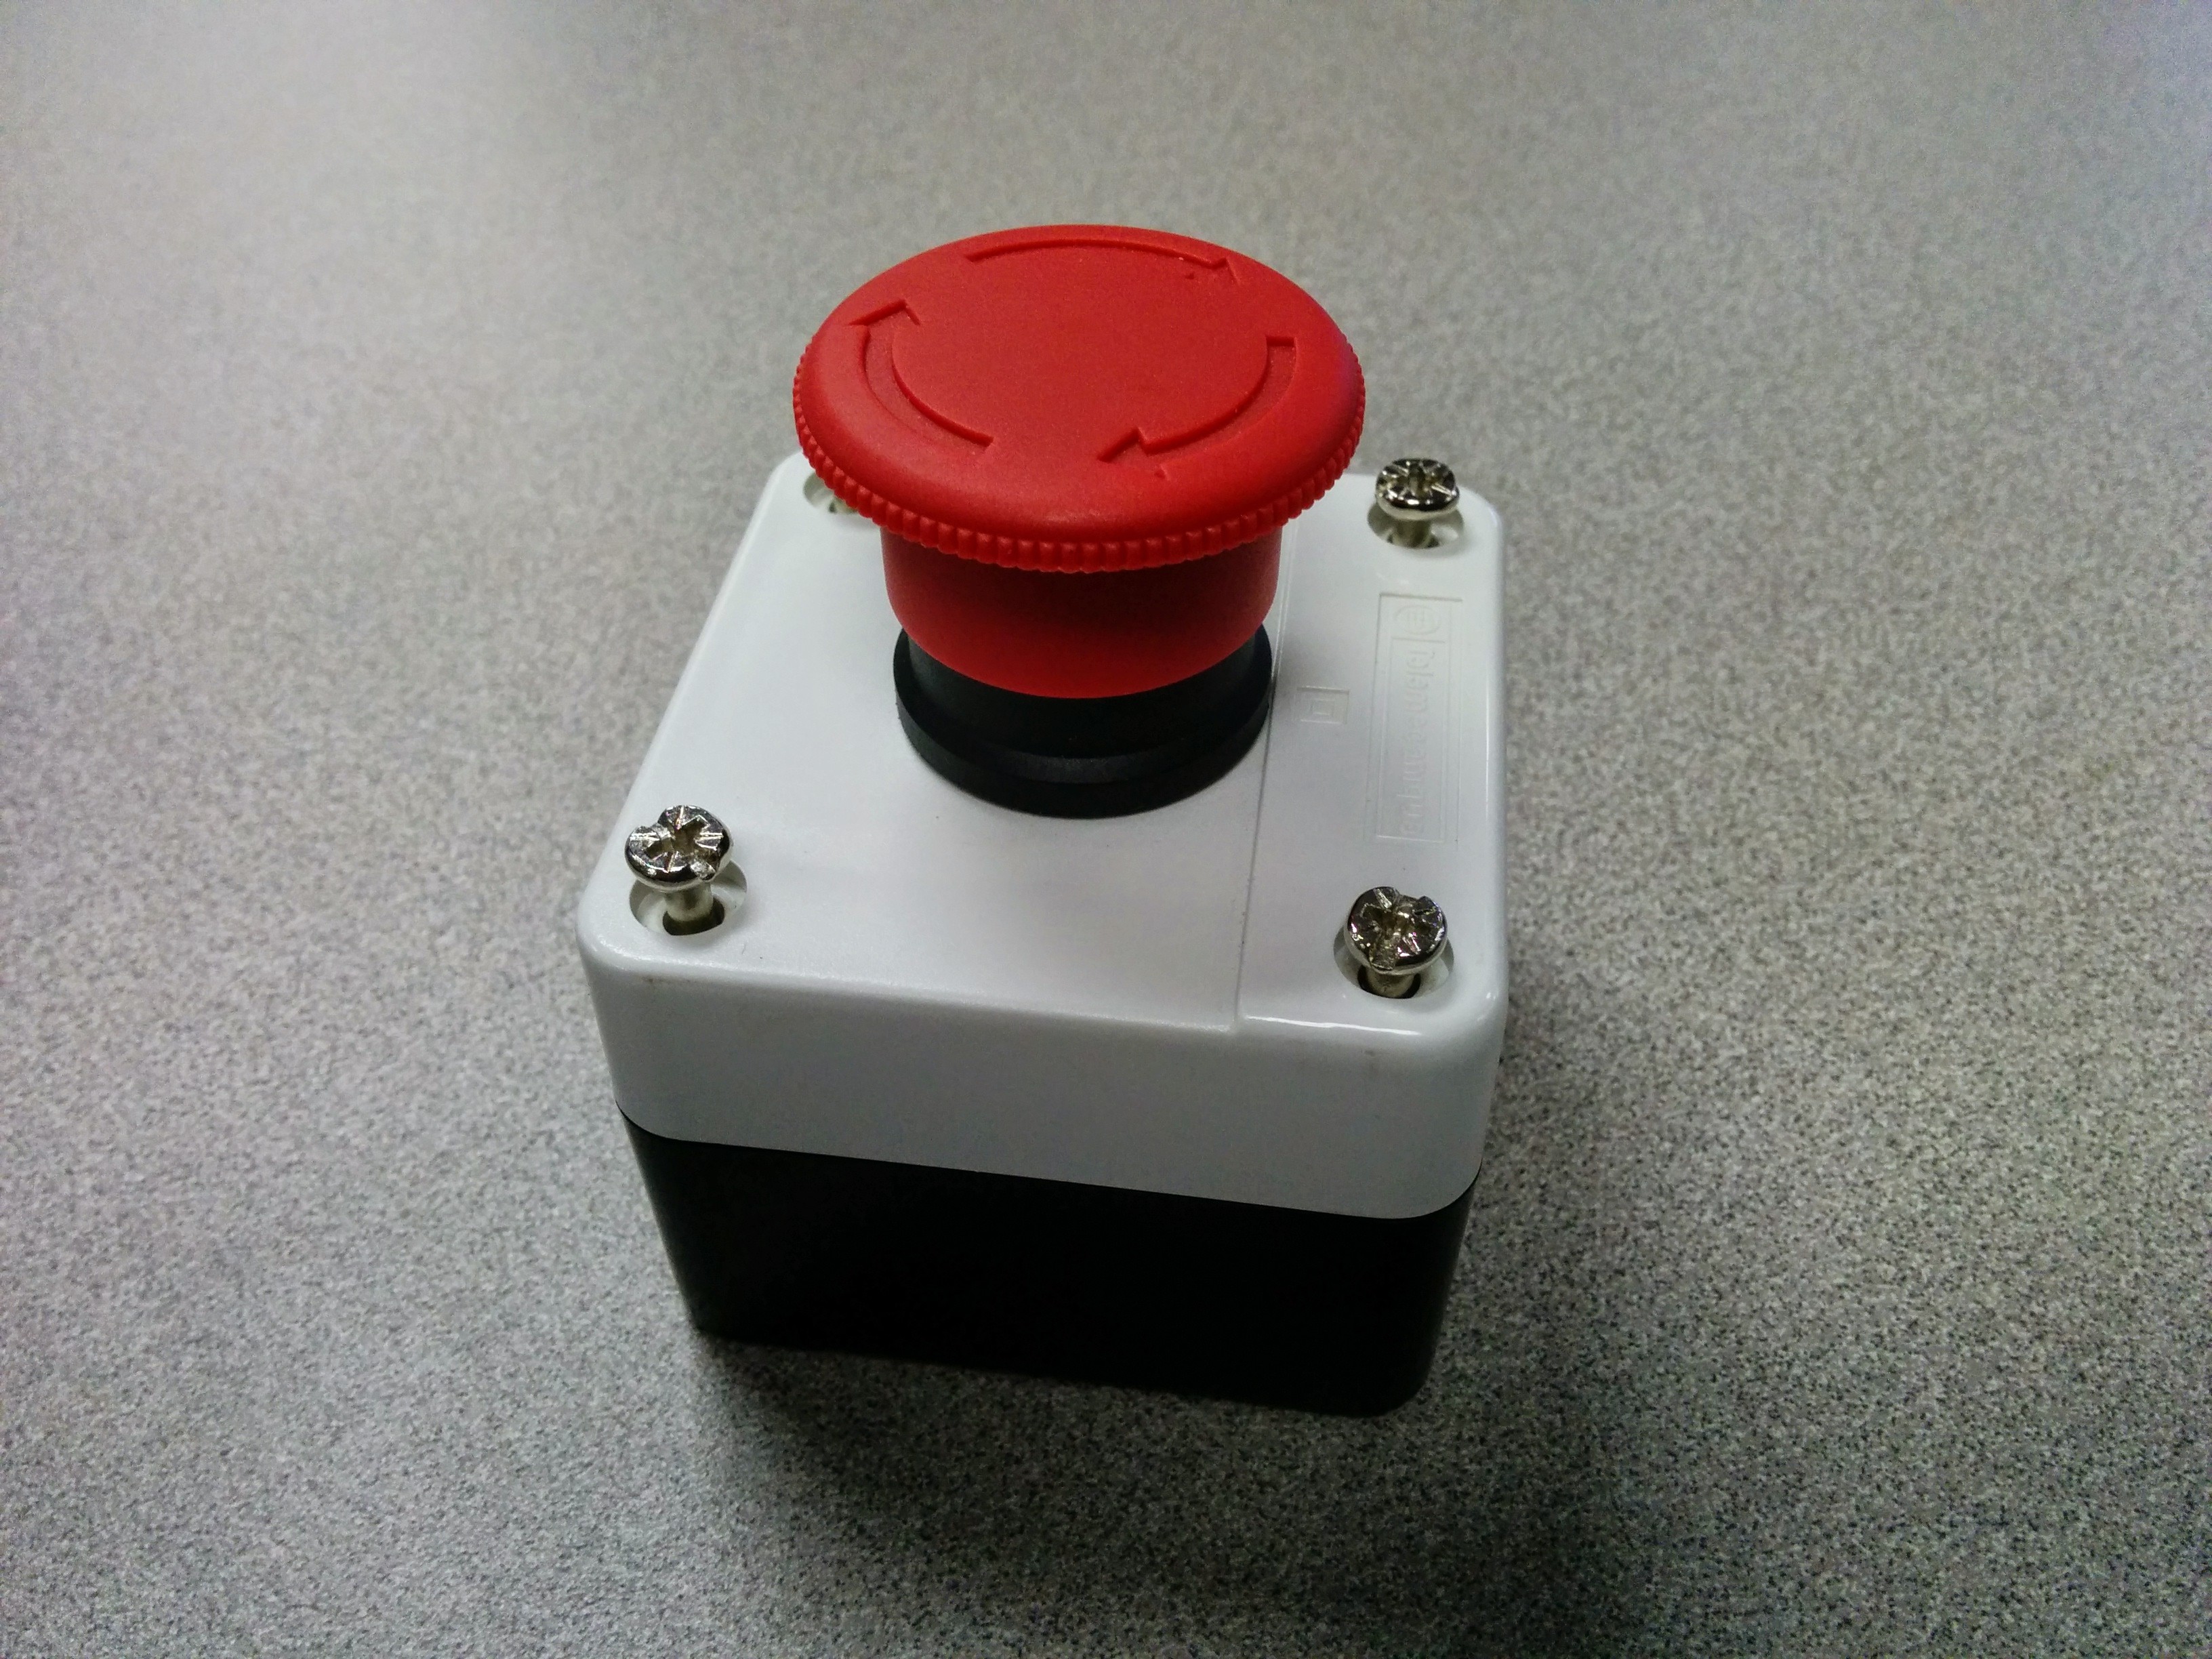
My company requires us to lock our computers anytime we step away. This is easy enough to do in Windows by pressing Win+L, but that isn’t the slack way. In addition sometimes you have already stood up, taken your hands away from the keyboard when you remember you need to lock the computer. So I decided to implement the BRB BRB (Be Right Back Big Red Button). This gives me a nice large button to push that locks my computer. It has the side benefit of just being fun to mash on.
Following is a quick run down of the parts and software. This is not a step by step build, though I may do one in the future as this is a simple and rewarding projects for someone of any skill level.
Parts
This is really a simple project you need the following (with estimated costs):
- Emergency Stop Push Button
$9
- Digispark knock w/USB micro
$5
- Micro USB cable
$5
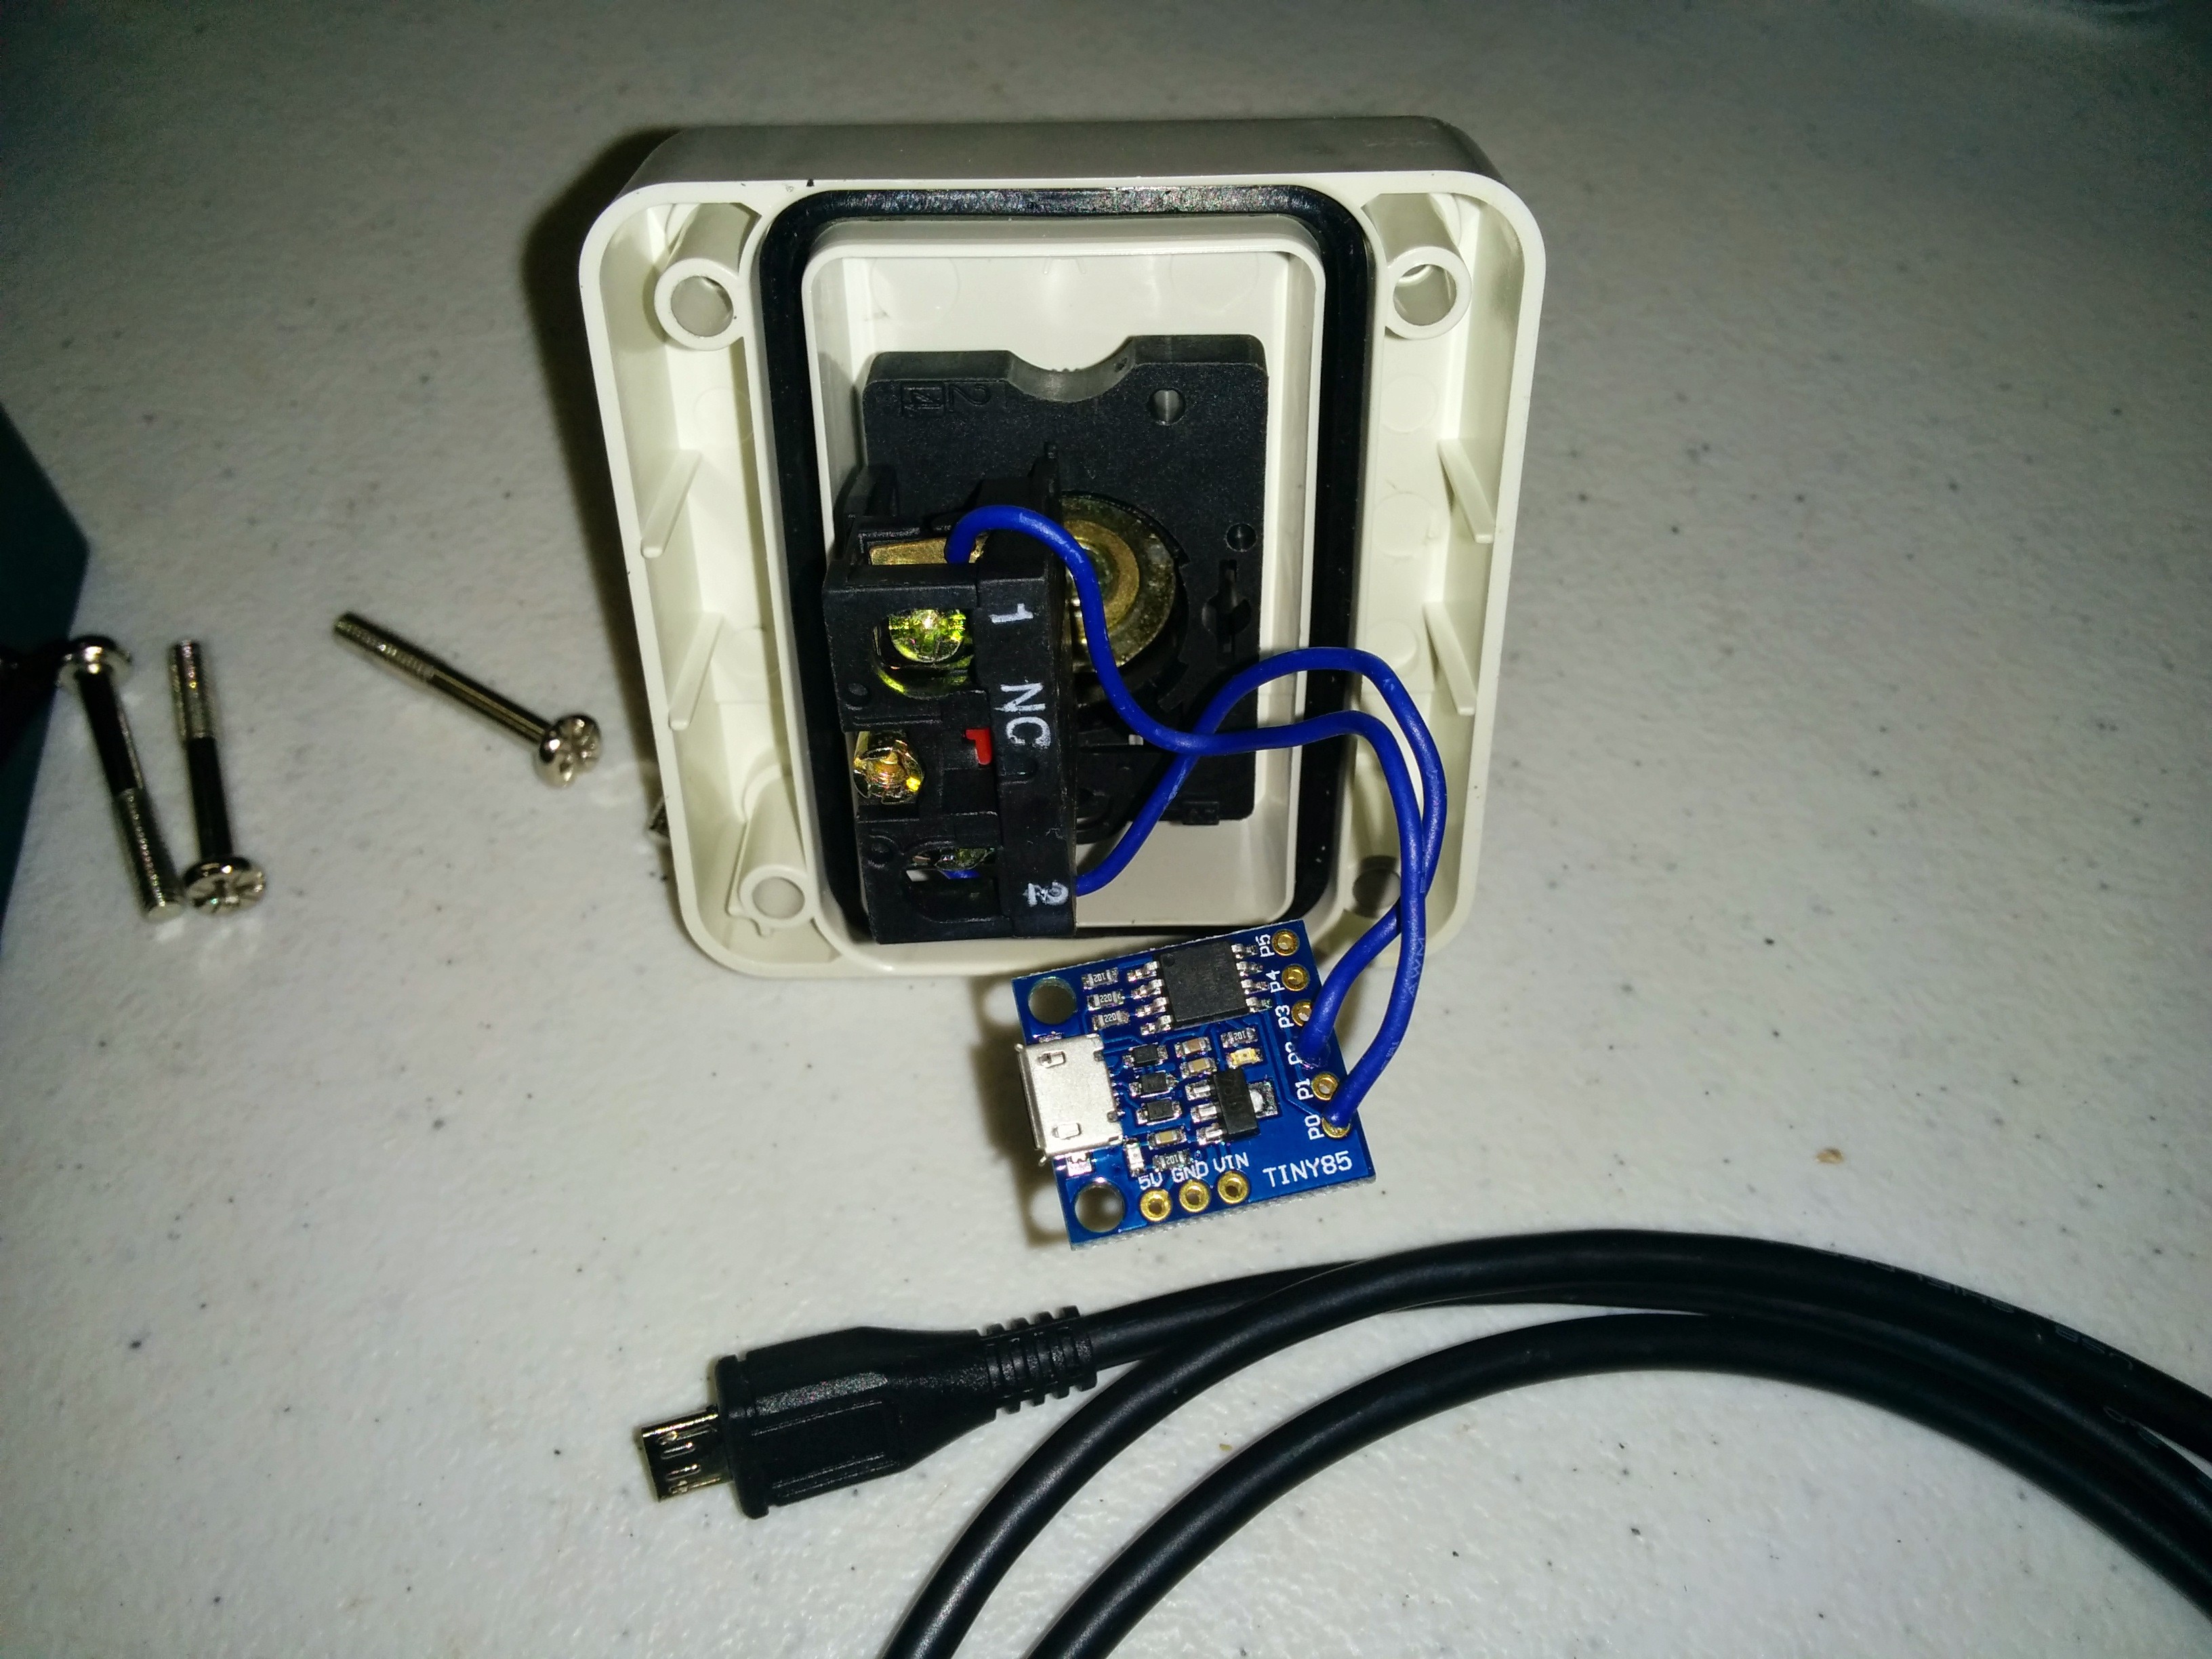
- Wire (4″), solder $0

The knockoff pictured above has a USB female connector and takes a standard USB micro cable. The authentic Digisparks have a built in USB A Male connector. If you want to use an authentic Digispark (good products, please support them) then you will either need to solder a cable or possibly use a Digispark Pro (code untested).
Assembly
Assembly is pretty easy. You need 2 short (about 2″) pieces of wire. Strip and tin each end and hook one to the P0 connection, and the other to the P2 connection. The GND could be used instead of P2, but I found everything fit better if I used connections on the same side of the board.
The E-stop button I used was normally closed (NC), but the software will work with a normally open (NO) switch with an easy change. There are only two contacts on the switch so connect one of the two wires to each contact. It doesn’t matter which is which. If you have both NO, and NC contacts just pick which set you want and make sure the software is configured appropriately.
Also, most E-stop buttons latches in the “stop” position when pressed. The one I purchased was no exception. It required a slight turn to get it to release. This was not the behavior I wanted, so I disassembled the button mechanics and was able to easily disable the latch mechanism in a way it could easily be reversed. The specific procedure required will depend on the specific E-stop that you have.
I drilled a small notch at the top of the black bottom piece to allow the USB cable to escape.
I then attached the USB cable, gently fit the component in and closed up the case.
Software
I used the Arduino environment with the Digispark configuration to program the Digispark.
Code: https://github.com/slackmasterstan/BRBDigi

0 Comments.